by Heather Mastrangeli | Mar 31, 2016 | Knitting, Patterns

 There is a treasure chest hidden within the walls of my local yarn store. Ok, it’s actually a wire basket filled with mark downs and discontinued yarns, but it serves me well and I always feel like I strike gold when I find a treasured hank of something special inside. The quantities are minimal, but somehow at 40% off I manage to convince myself that it’s great stash material and I make a purchase.
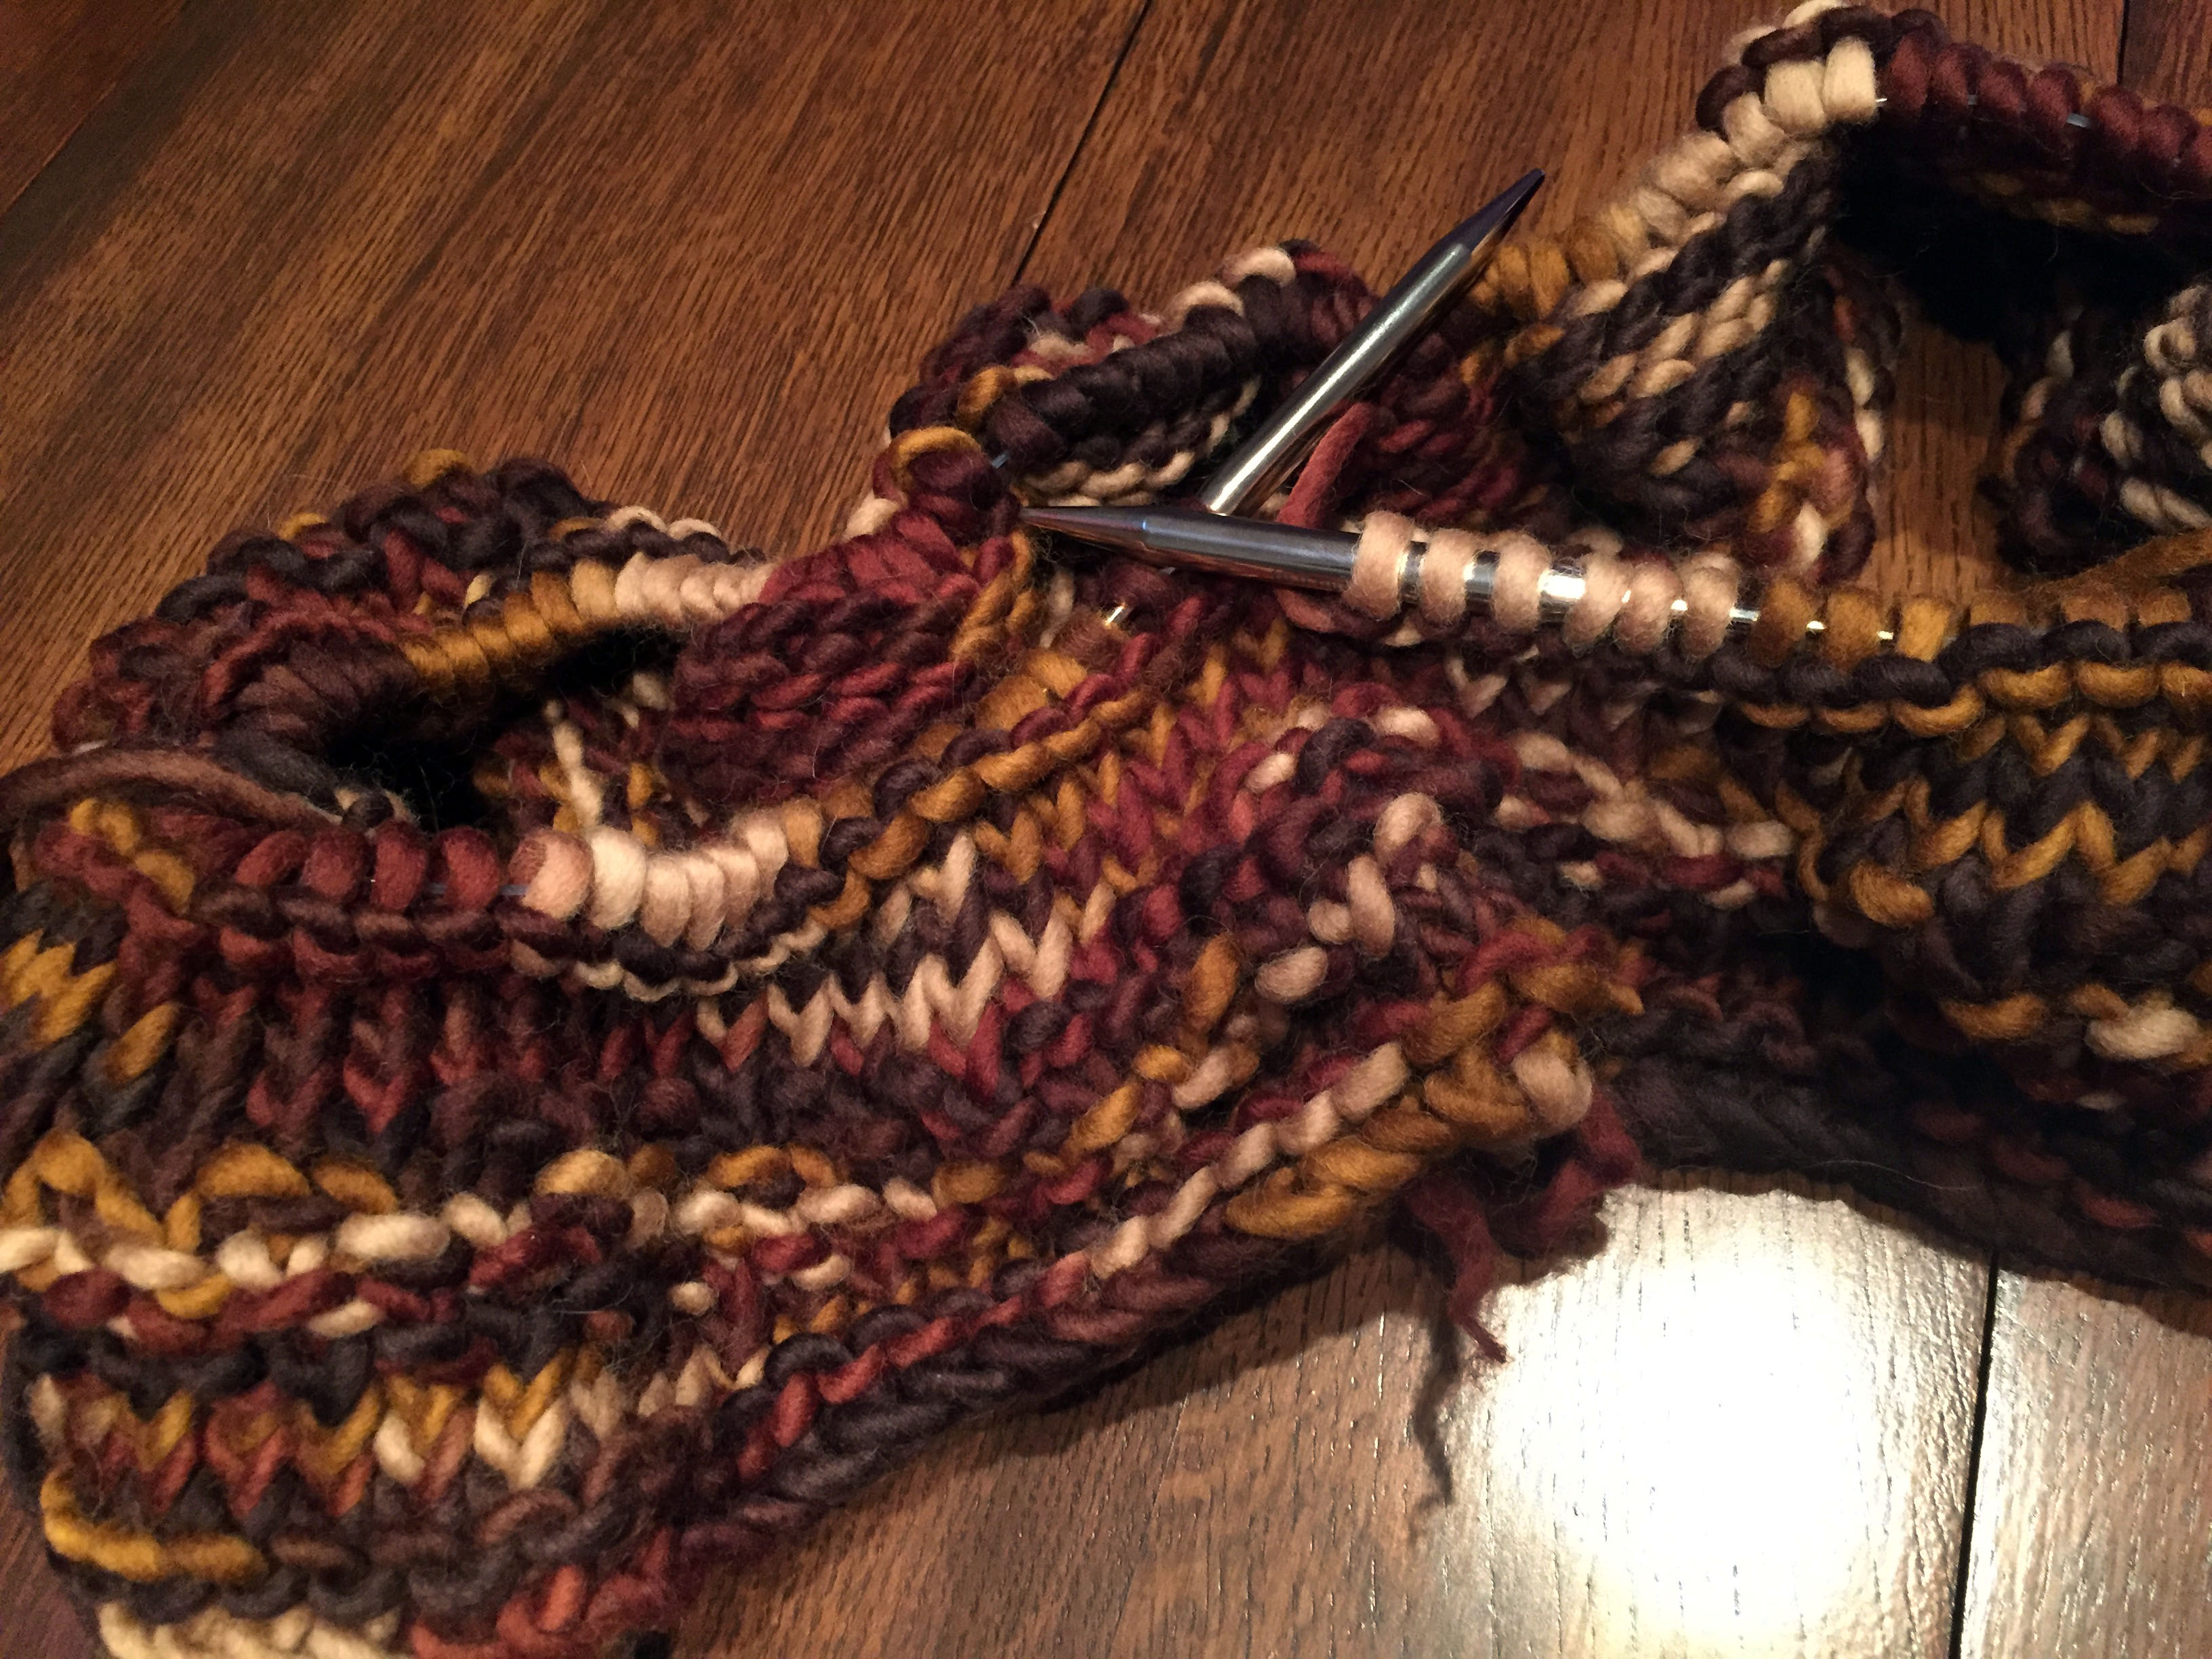
About six months ago I was digging through the treasure chest and found a beautiful hank of Cascade Magnum Paints. It was a captivating blend of multiple earth tone colors and thick single ply wool that seemed to have a halo of light radiating from it. Maybe a slight exaggeration, but I couldn’t put it down!
Not yet knowing what I was going to do with this giant hank, a purchase was made! That hank sat in my stash four months. There wasn’t enough yardage to do anything special with, and this was surely a special yarn. So it continued to take up real estate on one of my many yarn shelves. The yarn stash continued to grow and projects flew off the needles, and Magnum Paints sat idle.
Several months and multiple trips later, I was digging through the treasure chest again and I couldn’t believe my eyes! There was a luxurious hank of Cascade Magnum Paints in what appeared to be the same color way I had at home! I snatched that hank right up and immediately started to design the perfect cowl in my head. Wanting to develop a pattern that leveraged the beautiful color, but was fun to knit with interesting stitch patterns, yet simple, the wheels were spinning. Yes, let’s make it bulky, wrap it around the neck twice…
I got home and cast on. 127 stitches to be exact. Working in the round, I started with a couple of rows of garter stitch to prevent rolling and went from there. The result? A gorgeous, warm cowl with simple and interesting stitch patterning that leverages the yarn coloring for interest.
Want to make your own?
Materials
2 hanks of Cascade Yarns Magnum Paints (Super Bulky Weight)
US size 15, 32” circular knitting needles
Stitch Marker
Gauge: 8 stitches x 12 rows in stockinet = 4×4
Finished size is 35″ x 7″
Pattern
Cast On 127 stitches using the long tail cast on method.
Join yarn for working in the round and place stick marker. Move stitch marker up at the beginning of each round.
Row 1: Knit
Row 2: Purl
Row 3: Knit
Row 4: Knit
Row 5: Knit
Row 6: Knit 1, Purl 1 to the end.
Row 7: Purl 1, Knit 1 to the end.
Row 8: Knit 1, Purl 1 to the end.
Row 9: Knit
Row 10: Knit
Row 11: Knit
Row 12: Knit
Row 13: Purl
Row 14: Knit
Row 15: Knit
Row 16: Knit
Row 17: Knit
Row 18: Purl 1, Knit 1 to the end.
Row 19: Knit 1, Purl 1 to the end.
Row 20: Purl 1, Knit 1 to the end.
Bind Off
Weave in ends and block!
by Heather Mastrangeli | Mar 22, 2016 | Crochet, Patterns

One thing I loved as a kid were holiday crafts. Easter brought paper bunnies and decorated Easter eggs. As a child, my sisters, brothers and I would spend hours investing in coloring Easter eggs, arguing over who got to use which color when, trying to figure out who was hoarding the clear wax crayon and I especially remember my sister Stacy mixing the dark dye into the lighter colored dyes and causing a muddy color for the rest of us to work with. (Ugh!) Grandma always gave each of us a Fanny Mae milk chocolate bunny and the Easter bunny came with gifts of his own for all 5 of us. Those were the days.
Seeing I haven’t done an Easter craft project in well over a decade, I decided this was the year! My most favorite medium these days is yarn, and I have an increasingly growing stash that desperately needs to be busted through. Seeing Easter is right around the corner, I wanted something quick, not gauge specific and a project that required little yarn to make the most of the bits an pieces that I haven’t been able to part with.
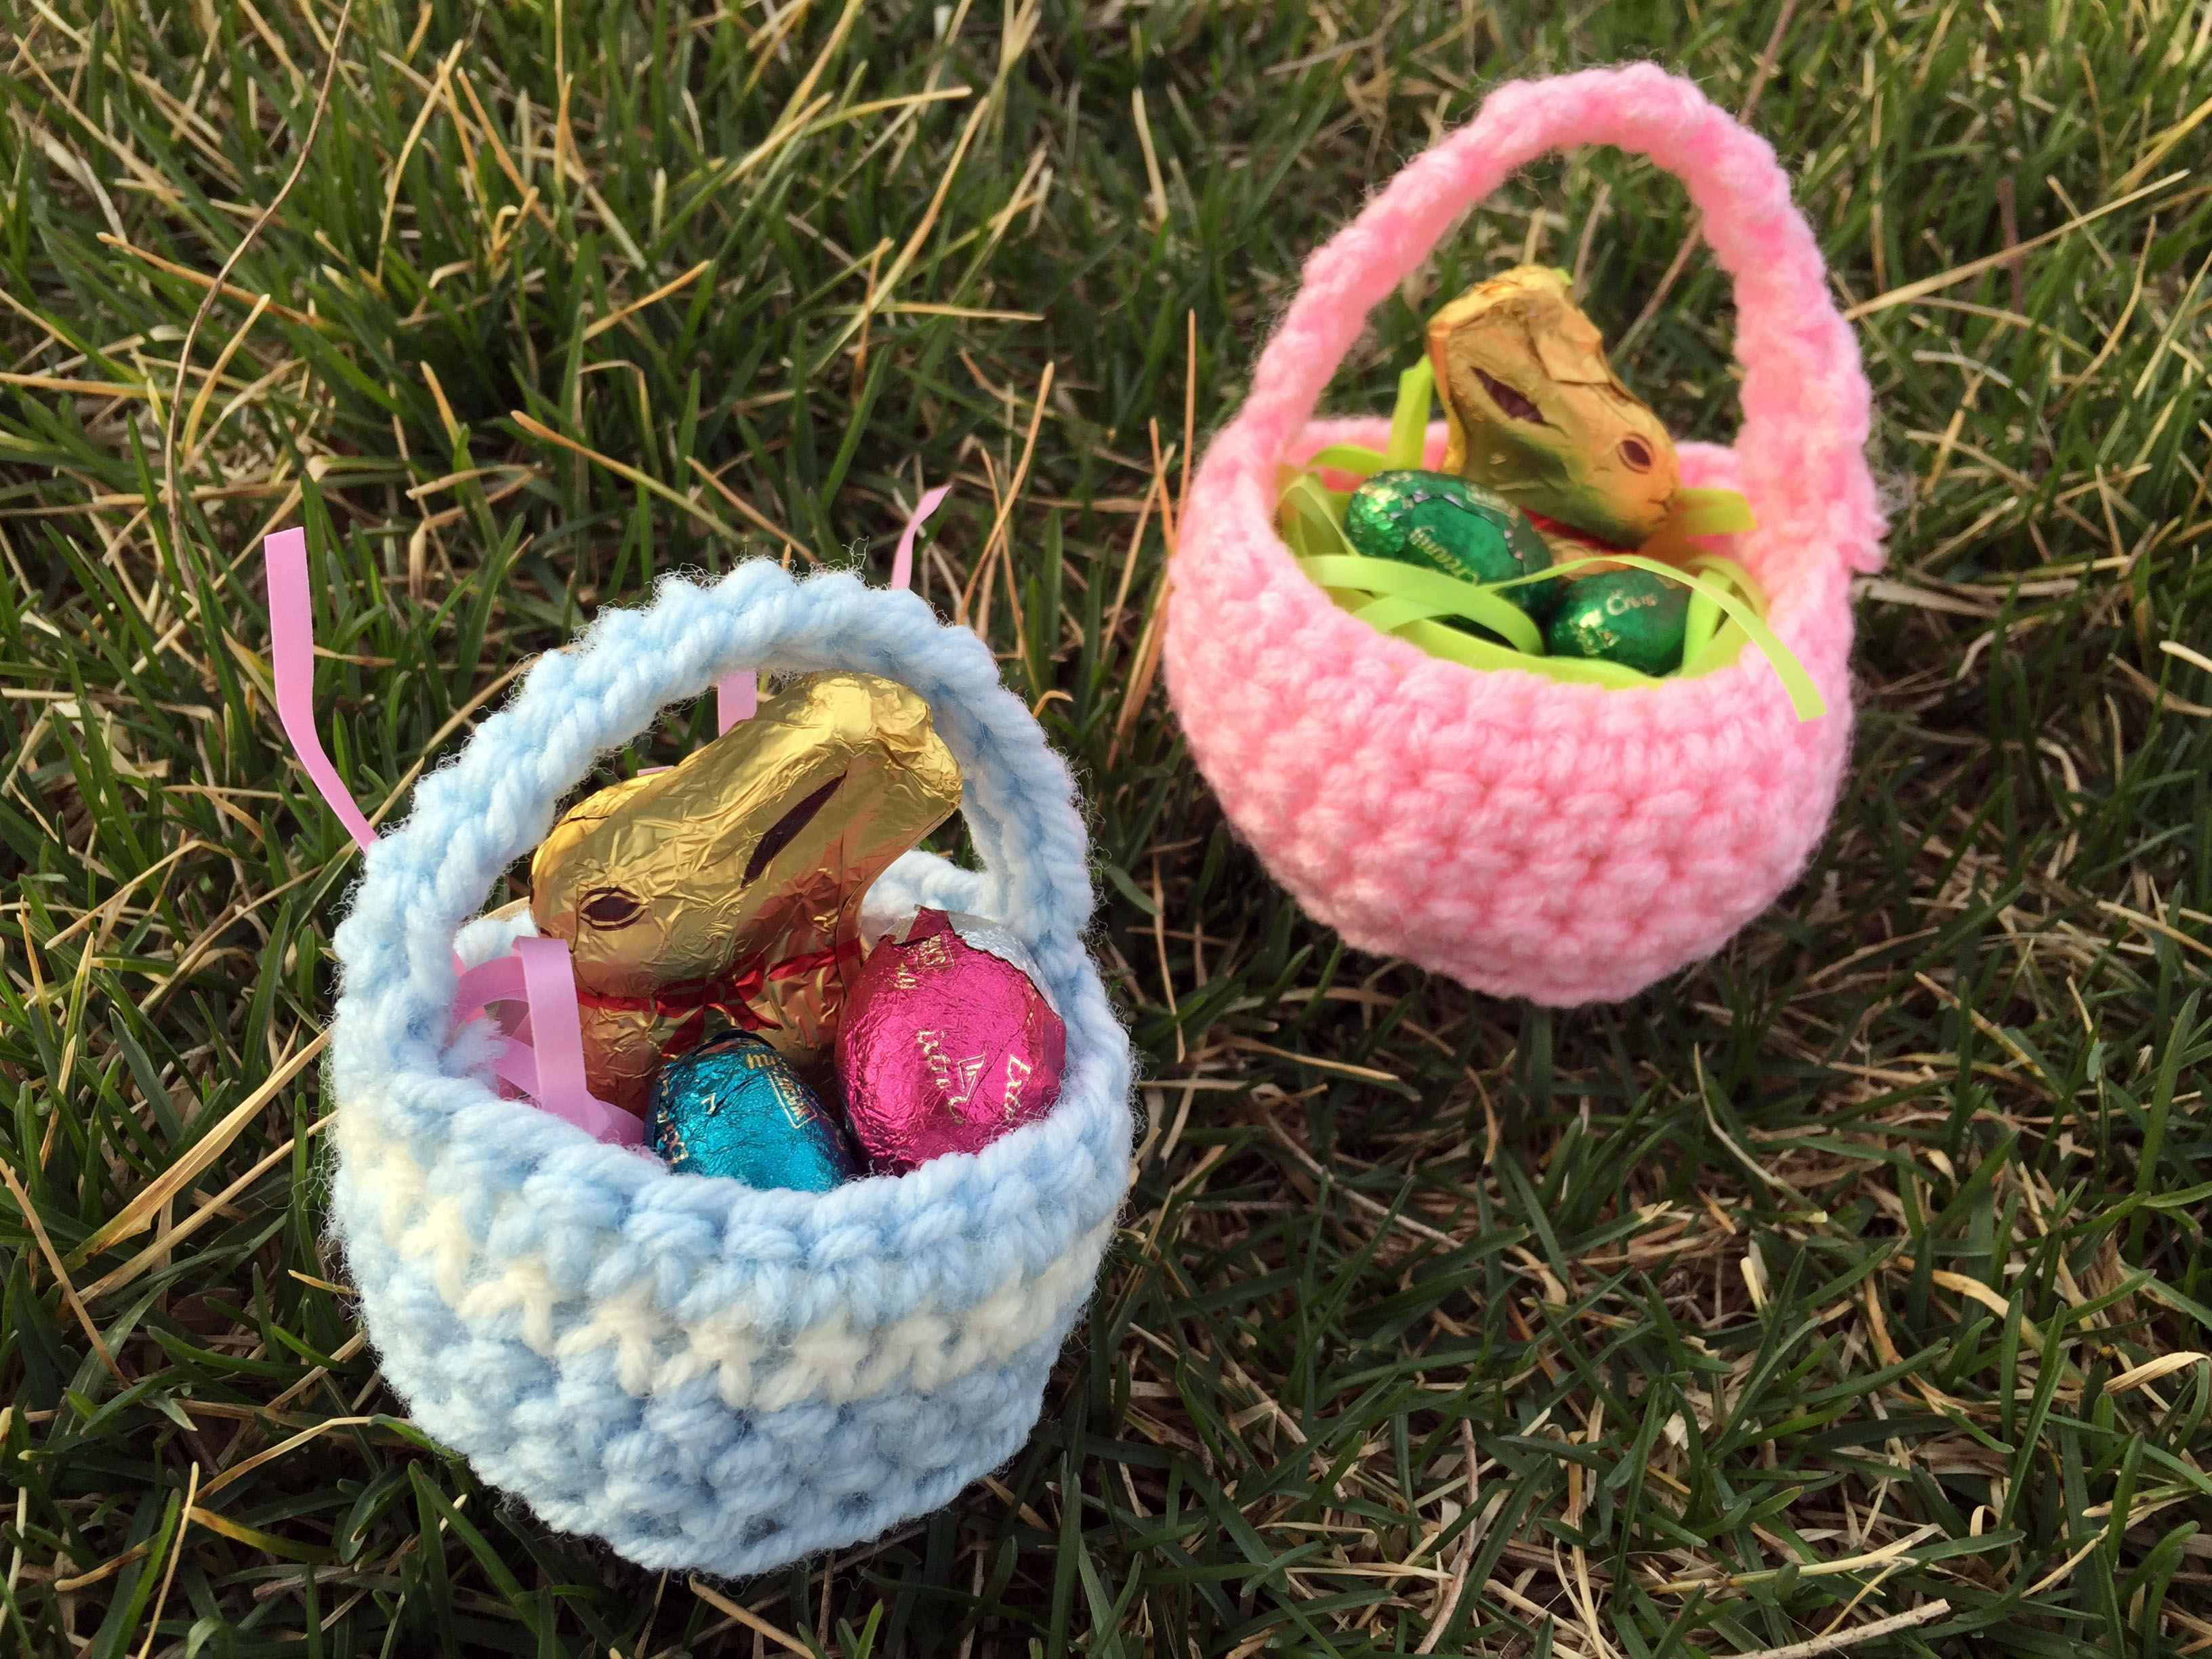
 These super easy mini Easter baskets work up in less than an hour and are big enough to hold a few candies or egg for someone in your life who needs a little Easter cheer.
Materials
- Size G crochet hook
- Worsted Weight yarn
- Yarn needle
Pattern
Bottom of basket:
Set-up: Using the magic loop method, single crochet 6 stitches into the loop and pull tight.
Join in the round with a slip stitch, chain 1
Row 1: 2 single crochet in each chain around, sl st to join, chain 1 (12 stitches)
Row 2: *(sc, sc, 2 sc in next stitch) *repeat to the end, join with slip stitch, ch 1 (18 stitches)
Row 3: 2 sc in first stitch, sc, sc, *(2 sc, sc, sc) *repeat around, join with slip stitch, chain 1 (bottom of basket should measure 2″ in diameter)
Sides of basket:
Row 4: Working in the back loops of the bottom of the basket, increase 1 in the first stitch by single crocheting twice in the first loop, single crochet in back post around, join with sl st, chain 1 (25 stitches around)
Rows 5- 7: Working in both loops, single crochet around, join with sl st, chain 1
Handle:
Row 8: sc 2, ch 1 turn
Row 9: sc 2, ch 1, turn
Row 10: sc 2, ch 1, turn
Row 11: single crochet 2 together, chain 1, turn
Rows 12- 18: sc 1, ch 1, turn
Row 19: 2 single crochet in stitch, chain 1, turn
Row 20: sc 2, ch 1 turn
Row 21: sc 2, ch 1 turn
Row 22: sc 2, ch 1 turn
Join the end of handle half way around basket and slip stitch in place. Tie off an weave in ends.
Abbreviations
sc – Single Crochet
sl st – Slip Stitch
ch- chain
by Heather Mastrangeli | Mar 16, 2016 | Knitting Needles
Wood Knitting Needles
Wood knitting needles provide the most friction between the yarn and the needle when working on them. This is a really great thing for the beginning knitter who is just trying to get those straight sticks to make a stitch and not have other stitches fall off the end of the needle. (We’ve all been there!) Wood needles are also great when working with an especially slippery yarn. As time has gone on, I’ve also found that I like the extra friction when working on a delicate project or a project that I am taking my time with, like a complex double knitted project or even small projects that I don’t want to slip off the needles as I’m tossing a work in progress into my knitting bag.
Plastic Knitting Needles
Plastic knitting needles are available in various quality levels. This is true of all material types, but I’ve noticed that the quality levels are more pronounced in plastic knitting needles as opposed to the other materials. Lower quality plastic knitting needles sometimes have seams on them which can easily catch on the yarn. The friction that plastic needles provides are a good middle point between the high level of friction with wood needles and the little friction that metal knitting needles provide. If you’re looking to work faster than you can with wood, but not ready to make the leap to metal, then plastic knitting needles offer a great middle ground. When selecting plastic knitting needles, looks for a variety that doesn’t have a seam running down the length and look for tips that about as long as the traditional wood or metal type.
Metal Knitting Needles
Metal knitting needles are often lighter weight than their wood counterparts and offer the least amount of friction between the knitting needles and yarn. This is especially important as you gain speed as a knitter and feel wood knitting needles are slowing you down. Metal needles allow for the yarn to glide off the needles quickly and offer a seamless surface. As I started to transition to metal needles, I found that I enjoyed them for heavier weight yarns before I was comfortable with worsted weight or lighter yarns. Once I was comfortable with using metal knitting needles on my bulky weight projects, I quickly transitioned the majority of my knitting to metal needles.
Knitting needles are also available in several styles. Straight, circular and double pointed needles.
Straight Needles
Straight knitting needles are a great option for items that are not too wide. They have stoppers at the end of the needle to keep work in place. Straight needles at best when you’re turning the work at the end of each row. My first set of knitting needles was a wooden variety pack found on Amazon! I loved them so much that I have two sets in my knitting needle collection!
Circular Needles
Circular knitting needles are extraordinarily versatile and make working straight and in the round a breeze! Circular knitting needles are available in a multitude of fixed lengths and also in interchangeable varieties. Fixed length circular knitting needles are comprised of two needles that are connected by a cable. The cable lengths vary and are selected based on the project you’re working on. The pattern often makes a recommendation for circular needle length. Interchangeable circular knitting needles come with needle tips and cables of differing lengths that you mix and match to achieve the desired needle setup. Depending on the kit, the knitting needles and cables connect by screwing the needle cable together or a quick connect method like the Addi Clicks. My first interchangeable set was a Susan Bates model and I was blown away when I received Addi’s for Christmas. The Addi Clicks are significantly lighter and the cables offer greater flexibility for smaller work and when using the magic loop method.
Double Point Needles
Double point knitting needles are often referred to as DPN’s. DPN’s are wonderful for small projects worked in the round and even for transitioning a larger circular project worked on a circular needle when decreases become more difficult on a cable. DPN’s are also a favorite tool when knitting cables into the work. (Personally I still rely on my trusty cable needle, but it’s an individual preference.) DPN’s are available in multiple lengths and sold in sets of 4 or 5.
With so many options for tools and so many different materials to choose from, where does one begin? I like to make my dollar stretch as far as possible and don’t believe in upgrading tools unless it makes a difference in my work. For the beginner knitter, I recommend a multi pack of wood straight knitting needles. After you become more comfortable knitting and want to dabble in larger projects or even circular projects (I.e. a seamless hat) then purchase a set of interchangeable circular knitting needles. The Susan Bates interchangeable set I purchased was half the price of my precious Addi’s and served me well. I still use them when my cables are tied up or I know that it’s a longer term project. If you’re looking for a versatile set of double pointed needles, this wood set is my favorite.
Hopefully we’ve helped navigate the knitting needle waters for you so you an make the best decision possible based on your needs and skill set. Let us know your favorite knitting needles in the comments below!
by Heather Mastrangeli | Mar 5, 2016 | Patterns

MountainTop Chalet yarn has a beautiful drape.
Have you ever started a simple garter stitch scarf to find that it doesn’t have the drape or thickness that you were hoping for? On one of my recent knitting store field trips I came across MountainTop Chalet yarn by Classic Elite Yarns. I was immediately drawn to it’s soft feel and was intrigued by the chainette construction, like the yarn had an i-cord appearance as opposed to a traditional plyed yarn. I also loved the chic colors the yarn came in, none of it dyed, all of it natural!
Determined to make something special with this yarn, I decided to use it to make a handmade gift for my mother-in-law. The goal was to make something soft and warm for the harsh Wisconsin winters she endures yearly while dog walking.
I started with a garter stitch scarf, but I didn’t like the drape of the fabric and it seemed much too thin to provide adequate warmth on a cool winter walk. After spending days scouring Pinterest for a special reversible pattern, relating in little inspiration, I decided to swatch a 2x2 rib. Success! A super simple, warm scarf was born!
Wanting to keep the edges tidy and also always wanting to start with a knit stitch at the beginning of each row, (it’s a weird preference of mine, I loath starting a row with a purl- it’s weird, I know) I cast on a multiple of 4 stitches and knit though one and a half hanks of MountainTop Chalet while slipping the last stitch of each row purl wise. It was super simple!
Materials:
Directions:
- Using a long tail cast on, cast on 28 stitches
- Row 1- K2, P2, repeat to end
- Rows 2 through the end- k2, p2 to the end, slipping the last stitch purl wise
This pattern is great to refining continental knitting skills, TV viewing and practicing knitting without looking!

 There is a treasure chest hidden within the walls of my local yarn store. Ok, it’s actually a wire basket filled with mark downs and discontinued yarns, but it serves me well and I always feel like I strike gold when I find a treasured hank of something special inside. The quantities are minimal, but somehow at 40% off I manage to convince myself that it’s great stash material and I make a purchase.